Wednesday, July 17, 2013

Grilled Summer Vegetable and Chicken Salad with Oyster Sauce Dressing

Don't freak out! Yes Oyster sauce....as a salad dressing. I know what you're thinking, um gross, but I promise it's not!  

Let's face it, it's been stupid hot across the entire country, climbing into the upper 70's here on the California Coast (I know that's not hot, but it is if you don't have AC and need to turn on your oven) so I wanted a hearty dinner salad to use up all of my fresh summer vegetables that came in our weekly Community Supported Agriculture box (if you haven't tried one of these, I suggest doing a little research and find a CSA near your home. Some need to be picked up and some are delivered to your house.)

The original recipe calls for fish sauce as the main dressing flavor, but I chose to use oyster sauce because it's much lighter in flavor making for a less fish dominant dressing. 


Ingredients for the Salad:
  • 1/4 cup unsweetened shredded coconut, toasted (sweetened with work too if that's what you have.) 
  • Vegetable oil
  • 6 fresh okra pods or 1 cup frozen okra, thawed  (I'm going to call this optional because while it's good, I feel that the okra didn't really add anything to the salad)
  • 3 ears of corn, shucked
  • 2 large zucchini, halved lengthwise
  • 2 long red chiles (such as Holland or Anaheim), stemmed
  • 1 small eggplant, cut lengthwise
  • 1 tablespoon sea salt
  • 1 small head of butter or Romain lettuce, torn to bite sized pieces
  • 1 store-bought roasted chicken, shredded
  • 1/2 cup white rice, cooked
  • Ingredients for the Dressing:
  • 1 garlic clove, minced
  • 1 teaspoon  light brown sugar
  • 2 tablespoons oyster or fish sauce (such as nuoc nam or nam pla)
  • 1 tablespoon fresh lime juice
  • 2 handfuls (loosely packed) mixed fresh tender herbs chopped (such as basil, cilantro, fennel fronds, marjoram, mint, and tarragon, basically whatever you have on hand or in your garden, but MINT is a must!)

  • Getting started....
    Heat your grill to medium, too hot and you'll toast your delicate veggies.  

    First, rub your ears of corn with vegetable oil, sprinkle with salt and pepper, place on grill to char. 

    Also, place your whole peppers on the grill as well. 

    Next, you want to make your dressing because the flavors seem to get better as they sit together in the fridge.

    In a small bowl whisk all the ingredients for your dressing, adding a little salt and pepper to taste. Set aside in the fridge. 

    While the corn grills (hello, it takes longer) you want to prep the rest of your veggies for the grill. 

    • Use a pastry brush to evenly coat all of your cut vegetables with oil, sprinkle with salt and pepper. Yep, everything, even your okra if you're using it. 
    • Using tongs, place everything cut side down on your hot grill.
    • Turn over the corn and the peppers. Remove the peppers when they begin to blister. place in a bowl and cover with plastic wrap while you finish everything else. This will steam the peppers and make it easier to remove the skins. 
    • Cook vegetables until softened and have lovely grill marks, use your judgement on the time as some people like their veggies cooked more than others, but plan about 6 minutes for the zucchini and eggplant. 
    Once everything is grilled, it's time to put your salad together.

    Chop all of the vegetables into bite sized pieces and remove the corn from the cob (easiest way is to stand the corn up on it's flat end and gently slice down with a sharp knife.) Taste your peppers before adding all of them. We learned the hard way that ours were really hot. 

    Toss with chicken, rice, coconut, and lettuce.

    Give your dressing one more good whisk to make sure that nothing separated. Drizzle your dressing over your salad and toss to coat well. 

    Bonus! If you happen to have good french or sourdough bread around, coat with oil, salt and pepper and grill alongside your veggies for homemade croutons! 


    Sunday, April 14, 2013

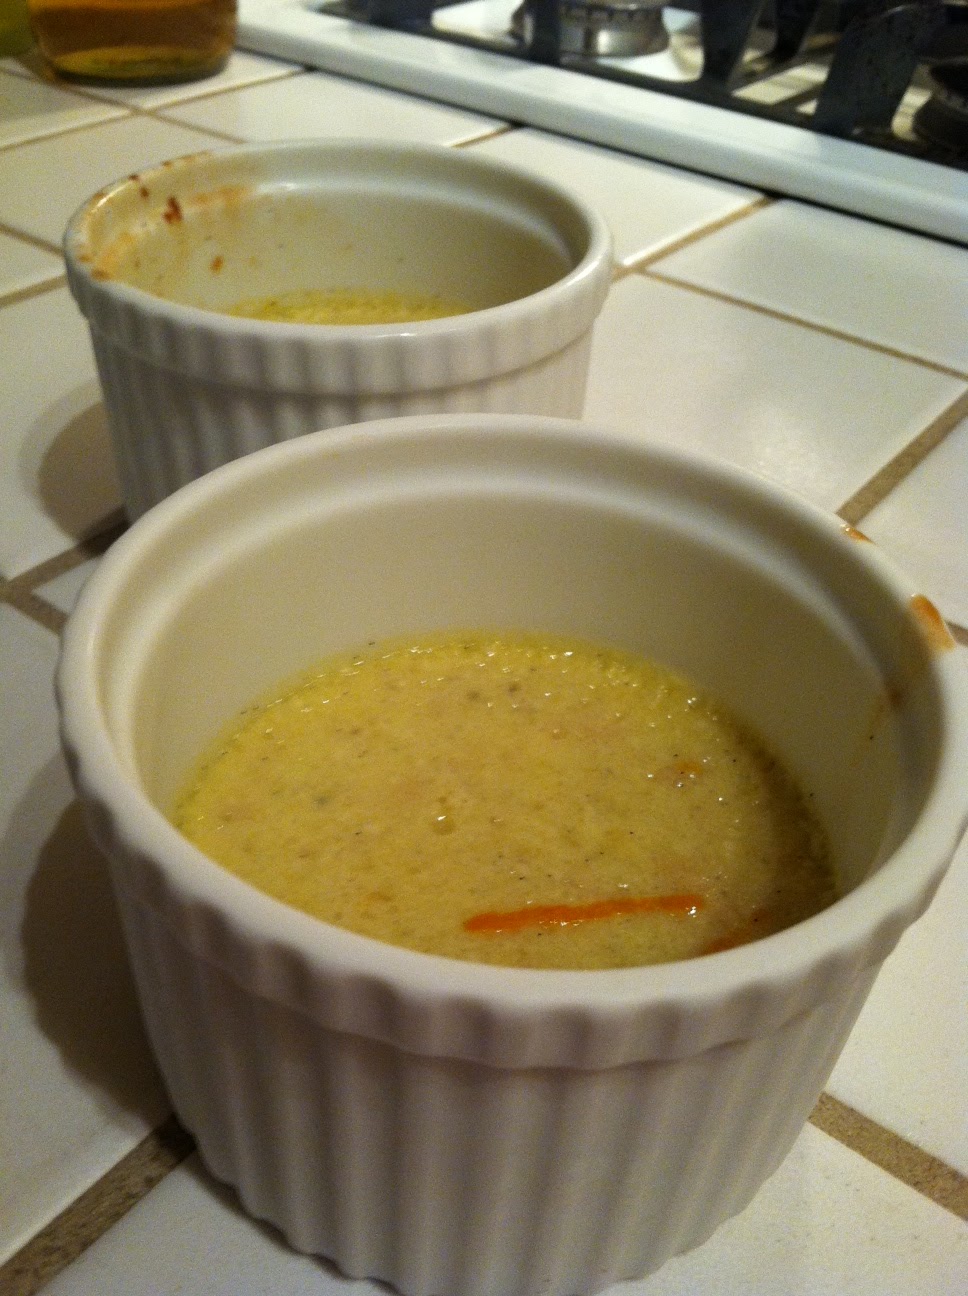
    Cherimoya Coconut Creme Brûlée

    Within the last year, I discovered that I am allergic to dairy. No more cheese, no more cream, no more milk, no more everything awesome. I lamented the loss of some of my favorite desserts. Ice cream, cream cheese frosting, whipped cream, and of course creme brûlée... I've scouring the net, reading blogs and discussion boards about how to still enjoy a food life without dairy. I quickly discovered that soy or coconut milk coffee creamer is a pretty decent substitute for heavy cream and that a can of coconut milk can be turned into whipping cream very easily.  

    I had a wicked craving for some creme brûlée and really wanted to try out my new kitchen torch, so I started sifting the net for dairy-free version of the creamy sweet, crunchy, hot-cold treat. I also had a Cherimoya on hand (a custardy, tropical fruit) 

    I came across 2 recipes that intrigued me, 1 with heavy cream and Cherimoya and one traditional one that replaced the heavy cream with coconut cream. I made a hybrid of yumminess. 

    Here's what I came up with:

    Cherimoya-Coconut Creme Brûlée 
    Serves 4

    1 medium Cherimoya, peeled, seeds removed and pulp mashed up (* if you don't have Cherimoya, simply add 6 more egg yolks)
    1 vanilla bean split lengthwise, with bean grains scraped out
    1 can coconut milk (or 16 oz heavy cream if you're into dairy)
    pinch of salt
    1/2 teaspoon orange zest
    4 egg yolks
    1/2 cup granulated sugar 
    1/4 cup granulated sugar for the top

    The night before you want to make your dessert put you can of coconut milk in the fridge. By chilling the milk, the "cream" portion will rise to the top of the can and the water will settle to the bottom.  Carefully scoop the cream out for the recipe trying to avoid as much of the water as possible. 

    1. Preheat the oven to 350 degrees.
    2. Combine the cream, vanilla bean grains, and salt in a sauce pan and simmer over medium heat for about 15 minutes. Do not let it boil!
    3. Remove pan from heat and add the Cherimoya and orange zest, stir to combine. Set aside.
    4. In a large bowl, whisk together egg yolks and sugar until combined. This only takes a few moments.
    5. Slowly pour warm cream mixture into the egg/sugar combo while whisking to mix thoroughly.
    6. Divide mixture into 4 baking ramekins and place the ramekins in a lasagna or other baking pan.
    7. Fill baking pan with water 2/3 of the way up the sides of the ramekins and bake Creme Brûlée for 45 minutes to an hour, until set and not jiggly.
    8. Remove from pan and allow to cool for 30 minutes. Place in refrigerator for 6 hours to over night.


    The next day...

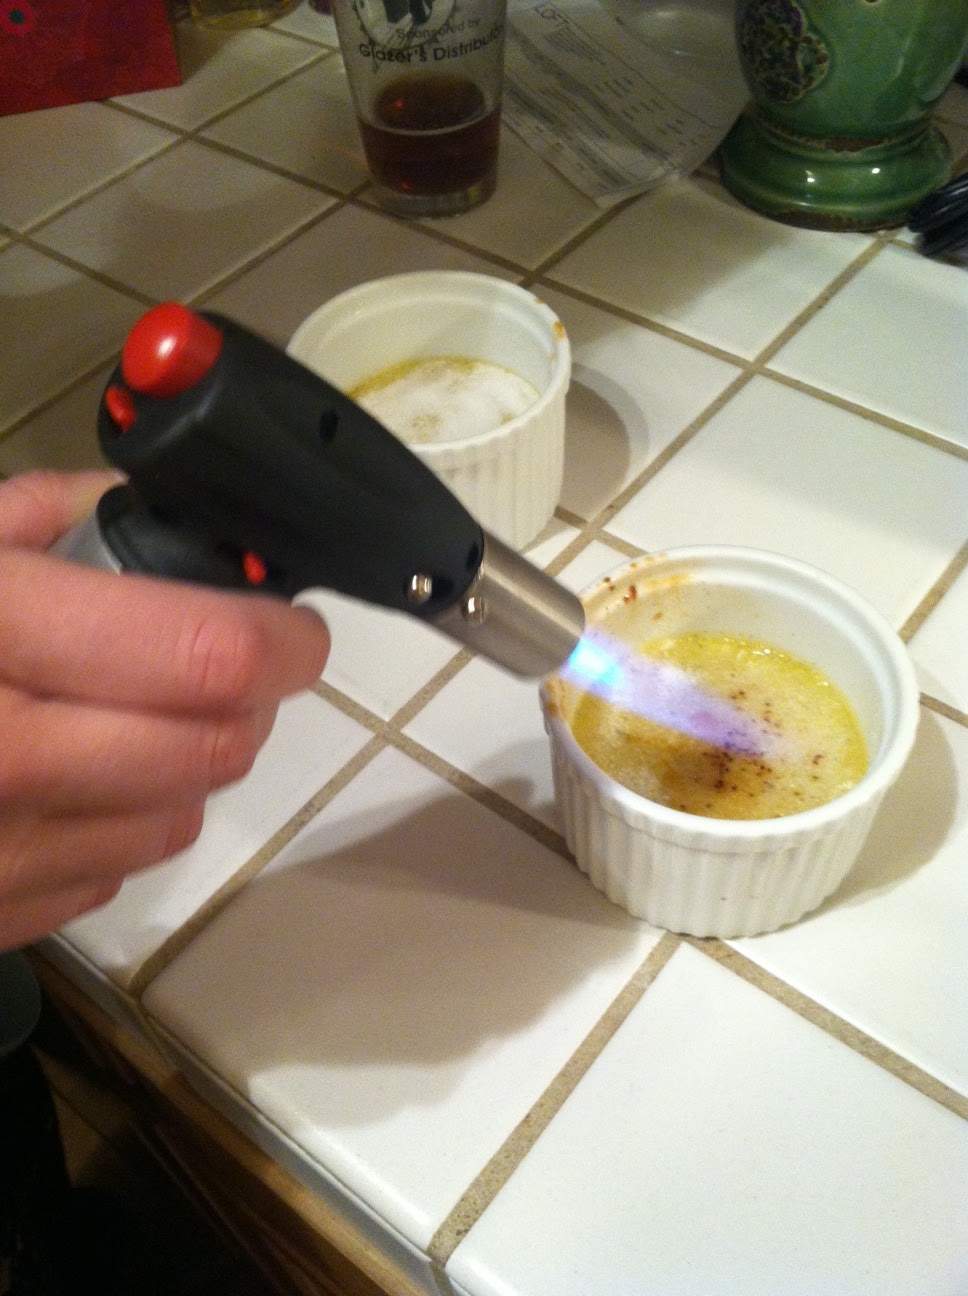
    Sprinkle 1/4 sugar evenly over all 4 custards. Use a kitchen torch to slowly caramelize the sugar. Be cautious so you don't burn the sugar (it tastes bad...)


    If you don't have a kitchen torch, set your oven to broil on high. Place sugar covered custards in the oven and keep an eye on them while the sugar caramelizes.

    Let cool slightly and then enjoy by cracking with the back of your spoon and devour!


    Saturday, March 16, 2013

    Asian Inspired Shrimp Salad

    Forgive me readers, for I have sinned. It has been nearly a year since I last posted something tasty and delicious to share with you. I shall wash dishes by hand for 2 meals as a form of repentance.....

    Over the past year, I spent way too much money visiting our local Farmer's Market and wasted far too much produce because I can't help but buy too much. As a result, I decided to sign up for a local CSA produce delivery company. We get a mini-box for $25 a week and it comes with just enough stuff to keep us vegetable friendly for most of the week. We used ALL of it last week.  Even the pea shoots (I was like, WTF do I do with pea shoots? Turns out they're great) and I wanted to share an amazing salad we tossed together for an easy dinner one night.

    For the dressing:

    2 Tablespoons rice vinegar
    2 Tablespoons canola oil
    1-2 teaspoons red curry paste (up to you on how spicy you want it)
    1 teaspoon sesame oil
    1 teaspoon honey
    pinch of kosher salt

    Whisk together and set aside until ready to serve.

    For the salad:
    1 pound shrimp (marinated in soy sauce, pineapple juice and sesame seeds)
    1 large bag of mixed greens
    1 handful of pea shoots or other Asian greens of your choice (watercress?)
    2-3 medium radishes, sliced thin
    1-2 medium carrots, cut into bite sized pieces, sliced thin
    1 head broccoli, cut into bite sized pieces


    1. Drizzle a medium sized skillet pan with a little bit of olive oil. Heat over medium-high heat.
    2. Add shrimp to pan with just a little bit of marinade. Sauté, stirring frequently, until shrimp is curled and no longer pink, about 10 minutes. Remove shrimp from pan.
    3. Add broccoli to pan and stir until bright green, but still slightly crunchy, soaking up some of the yummy marinade caramel left over from the shrimp cooking.
    4. Combine the greens, pea shoots, radishes, carrots, broccoli and shrimp.
    5. Pour dressing over salad and toss to coat everything!

    Enjoy a great, healthy, light but hearty dinner! A few small slices of a fresh baguette would be amazing to soak up any left over dressing!

    We had enough left over for me to take a small lunch and my salad stayed fairly crunchy.

    Tuesday, May 1, 2012

    South of the Border Lettuce Wraps

    Recently I tried a juice diet........It went pretty well and turns out that the book had some delicious meals included in it. The South of the Border Lettuce Wraps were so tasty that I adapted this recipe for after the strict non-meat plan.  The book is called Cherie Calboum's book The Juice Lady's Turbo Diet, just in case you're interested.

    2 ripe avocados
    3 tomatoes, diced
    1/2 jalapeno pepper, diced and seeds removed
    2 tbsp diced onions
    3 garlic cloves, minced
    1/2 cup fresh cilantro, chopped
    1/2 corn kernels
    2 tsp fresh lime juice
    6-8 large lettuce wraps
    1 Cup diced firm tofu or 1lbs chicken breast, grilled and sliced into bite sized pieces
    *shredded cheese, sour cream, salsa optional

    Original recipe calls for keeping everything raw and just mixing it all together...

    1. Lightly saute onions, garlic and jalapenos in a drizzle of olive oil.
    2. Add tofu or chicken and cook until warm.
    3. In a separate bowl, mash avocados.
    4. Place remaining ingredients in separate bowls and allow diners to assemble wraps as they wish.

    Saturday, March 31, 2012

    ***Crock Pot Alert*** Pork Pernil

    Puerto Rican slow cooked pork. I was sold in those few words when I saw in on Pinterest but once I saw how easy this recipe was, I knew I'd be in love for life!  The original recipe calls from pork shoulder but I used a tenderloin and it worked out amazing and probably has less fat that way. We ate ours as soft taco fillings, but you can also serve it in the traditional way, with rice and beans!

    2-3 lbs pork tenderloin
    4-5 cloves of garlic, crushed or roughly chopped
    1 tbsp salt
    1/2 tsp oregano
    1/2 tbsp ground cumin
    1/4 tsp black pepper
    3 oranges juiced, about 1/2 cup if you want to just use OJ, but that will make it sweeter
    2 limes juiced, about 1/2
    1/4 cup beer, optional
    Cooking spray

    The night before....
    1. Make 4 shallow slashes into the pork tenderloin. Don't cut all the way through, just about half-way and stuff full of garlic.
    2. Combine juices and spices in a bowl and whisk together.
    3. If your Crock-Pot bowl comes out, light spray with cooking spray. Place pork garlic side up on the bottom. Pour juice mixture over pork. If your Crock-Pot bowl does not come out, place tenderloin in a large Ziploc bag and pour in juice mixture, seal.
    4. Allow to marinade over-night in the fridge, turning once if you have time before bed.

    The day of...
    1. Place pork and juice in the Crock-Pot and cook on Low for 6-8 hours, add beer if your slow cooker tends to dry out the juices and burn things (mine does.)
    2. Shred pork in pot and stir with juices. Let cook another 15-30 minutes.
    3. Yep, you're done.


    Definitely not one of my best photos, but you get the idea of how it should look!

    Tuesday, March 20, 2012

    Homemade Body Scrub

    As winter turns to spring, most of us are in need of a good scrub to get rid of dead dry skin cells. For years I've been making my own exfoliater because I'm allergic to all the harsh fragrances and chemicals found in more store-bought body scrubs. Here's how I make it....

    2 Cups Epsom salts You can use sugar for a finer grain scrub, but note that the oil dissolves the sugar faster and your batch won't last as long. 
    3/4 Cup light olive oil or safflower or grape seed oil, in a pinch you could even use vegetable oil (if you don't want to smell like a salad, skip the olive oil and look for something else)
    5-6 drops essential oil, like grapefruit or lavender (you can find this at most health-food stores)
    5-6 drops water based food coloring *optional*

    In a large bowl stir together salt and oil until salt is moistened but not an oily mess. Add essential oil and food color. Stir together and store in an air-tight container.  This amount is good for about 2-3 weeks of scrubbing.

    Use in the shower or add a few handfuls to your bath water.  Try not to let water get in the container as it will slowly dissolve the salt.  

    Caution: Your shower will be slippery.....

    Sunday, March 18, 2012

    Beer Brownies


    What do you do that day after St. Patrick's Day with all that leftover Guinness? You make brownies of course!!!! (I know that right now you're shouting at your computer about the blasphemy that is leftover Guinness, but for those of us who were quietly enjoying the day at home, there's bound to be 1 or 2 bottles that didn't get consumed....)

    I saw this recipe on Pinterest and traced it back to what I think is the original post, a blogger named Patent & the Pantry. It's a really cute blog and her brownie recipe was killer so I'm thinking the rest of her stuff is great too. I'll be trolling her site regularly for inspiration.

    A word of caution about reducing Guinness on the stove top....It foams up and over flows really fast if you let it come to a boil and yes it does catch on FIRE if you have an open-flame gas range....so don't try to rush it by turning the heat up...


    1 Cup all-purpose flour
    3/4 cup cocoa-powder (the unsweetened baking kind)
    1/4 tsp salt
    6 tablespoons butter, softened, cut into chunks
    1 Cup of semi-sweet chocolate chips
    3/4 cups of milk-chocolate chips
    4 large eggs, room temp or close to it
    1 Cup sugar
    2 bottles of Guinness beer
    3/4 tsp vanilla
    1 Cup white chocolate chips (I didn't have any so I used semi-sweet and it was still awesome)
    Powder sugar for dusting

    1. Heat your oven to 375 degrees. Line a 9X13 baking pan with parchment paper for easy brownie removal, or just spray lightly with cooking spray

    2. Take out your eggs and butter, set on the counter where they won't roll away.

    3.  Pour beer into a small pan and set to a simmer over medium-low heat. Allow to cook until reduced by half, about 25 minutes.  You'll want about 1 1/4 cup of beer-syrup. Remove from heat and let cool. *cooking down the beer is key to the flavor and fudgey consistency of these brownies. Don't skip this step*

    4. While beer is cooking, whisk together flour, cocoa-powder and salt in a large bowl until well combined.

    5.  In a microwave safe bowl, combine butter, semi-sweet and milk-chocolate chips. Microwave for at 30 second intervals until melted and you can stir together for a nice smooth consistency. Set aside to cool lightly.

    6. In a mixer, cream together eggs and sugar until light and fluffy, about 3 minutes on medium-high setting.

    7. Slowly pour chocolate mixture into egg/sugar fluff. Mix on medium speed until well combined.

    8. Add flour mixture and stir until just moistened. Don't over mix it! There's more mixing to come, don't panic.

    9. Switch to a whisk attachment and slowly pour in beer syrup and vanilla.  Whisk until it's all mixed in good. It's going to take a few minutes and the batter will be very runny when you're done.

    10.  Pour into prepared pan and give a good jiggle to shake the bubbles out. Sprinkle white chocolate chips evenly over batter.

    11. Bake for 20 minutes or until toothpick comes out clean.

    12. Let cool and cut into squares. Sprinkle with powder sugar if desired.